If no menu
or buttons show
ensure you have
scripting enabled
Please give time
for menu to load


|
|
Recoil Assembly
''No-No's''
|
Rohrbaugh has recently
taken new pic's of the entire recoil assembly - to point
out wrong methods of reassembly - a critical and important
process. I am posting those pictures, as well as repeating
one or two others on this page - it is vital people
understand the right and wrong method.
The pictures with accompanying text will soon be going
out with every new gun. |
|
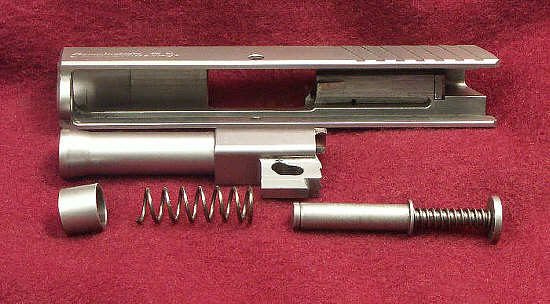
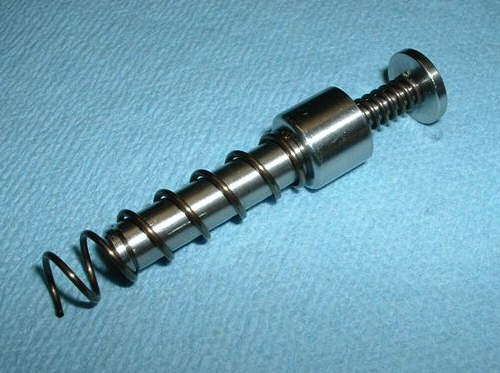
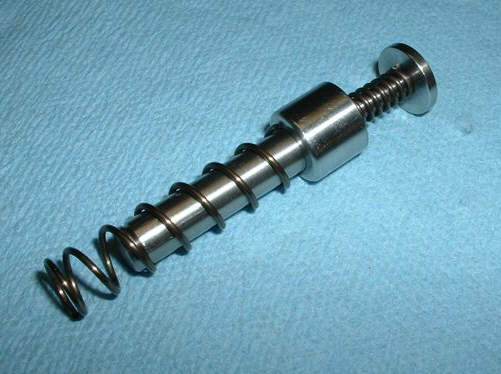
First - a view of
the ''exploded'' assembly - note end cap position
and orientation ..... note also the main (larger)
coil spring, has its finished end coil facing toward
the guide rod end collar, to right. The unformed
end goes into the cup on the left.
|
|
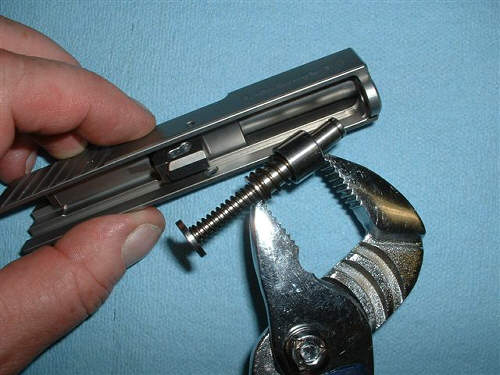
This is Rohrbaugh's
suggested and recommended method of compressing
main spring for reinsertion of the recoil system
into the barrel/slide assembly. Channel-lock pliers
are shown.
|
|
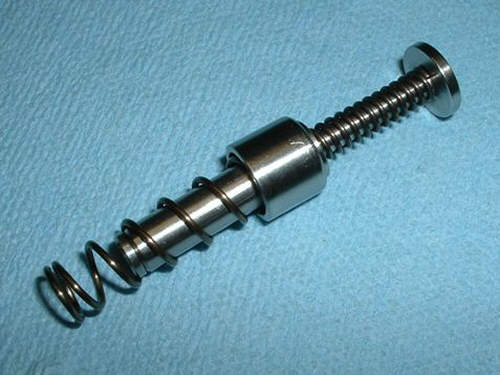
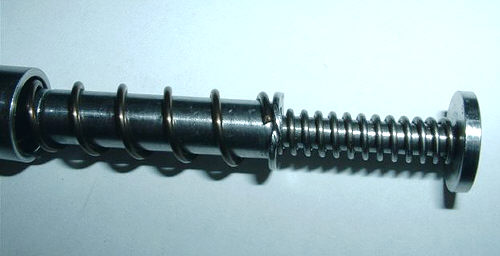
The first picture
showing incorrect assembly. Note well - the end
cap is at the incorrect end of the main
guide rod, and up against the guide rod collar.
WRONG!! ... although the spring unfinished
end is inside that cap. The spring and end cap
must be removed from this situation and turned
180º - then installed.
|
|
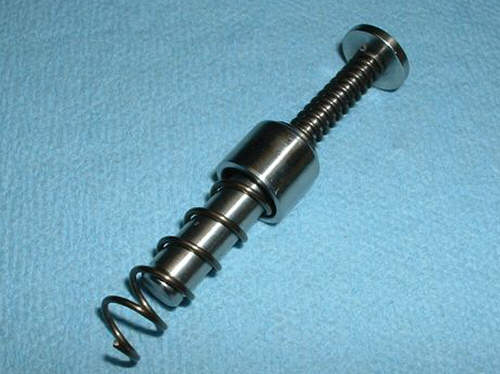
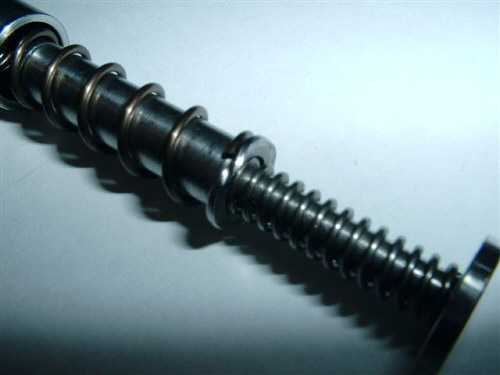
A second transgression
- once more the end cap is at wrong end of main
guide rod, and up against the guide rod collar
... this time the spring is also incorrectly oriented!
Solution .... remove mainspring, remove end cap
... place mainspring onto outer guide rod, finished
end first .. and then place end cap over main
spring's unfinished end.
|
|
It gets worse!!!
Now, not only is the end cap against the guide
rod collar but - it is sitting over that
- not even against it!!! WRONG!! The mainspring
must be removed - and the end cap. Then the mainspring
slid over the outer guide rod, finished end first,
against the collar. After that, the end cap is
placed over the unfinished spring end.
|
|
Fourth in the house
of horrors! Basically just as bad as previous
picture but spring also reversed. Rather academic
really as this is again a seriously WRONG
situation.
The mainspring and end cap must be removed ..
and the spring turned 180º and slid over
outer guide rod so that finished end abuts guide
rod collar. Lastly, the end cap is placed over
the unfinished spring end.
|
|
To complete this
page - look at this picture. It shows quite clearly
just how much damage can occur when reassembly
is incorrect. The unfinished spring end has been
placed against the guide rod end collar .. note
well - the severe damage that has occurred to
the collar! Over time this just gets worse ..
and the gun will be irrepairably damaged. .........
slide and frame included.
|
|
And last - just
another view of the damage that can be sustained
when the mainspring unfinished end is seated against
the guide rod collar - instead of inside the end
cap. Note well.!
|
I have
not included lubrication
data with these pictures, as
this has been covered on another page
already.
Note however, we have a scanned
set of pic's from the current latest
disassembly/lube
manual as of Oct 2006.
|
|
Back to Top
|