If no menu
or buttons show
ensure you have
scripting enabled
Please give time
for menu to load


|
|
Stills
Sequence Video of takedown, reassembly and
Lubrication.
|
Well, another
video but this time based on a set of still
images. These were taken by forum member "TW"
when he was at the factory and Eric ran through
aspects of gun maintainance by demonstration.
This video along with the ones of my own operations
should hopefully, between them, help most
folks new to the proceedures to manage better.
The pic's below are just sample frames from
the whole video.
There are two files available. one of which
has been reduced rather harshly, but that
one might help for folks relying on dial-up.
If possible take the large file which displays
at 320x240 and is clearer. In fact the Media
Player window can be stretched a bit bigger
and still not be too bad.
Late addition (12/25/05) - I have also put
the stills into a PDF
file (1.9Mb) so if you want that for
reference it might be handy to have as well.
Right click on the link and do a 'save as''
to store on your own hard drive.
Please note!
- prior to my updating this material, please
check out the latest
manual pages on disassembly and lube
- things are different with lubrication. So,
where we see reference to grease we now are
talking good quality oil. |
|
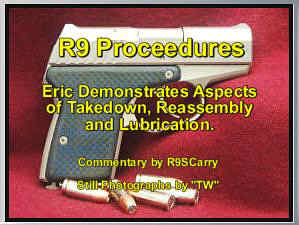
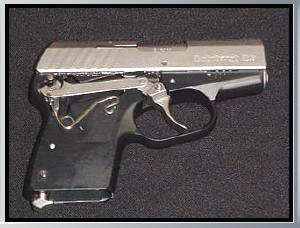
Just the
intro screen, showing a hopefully not
too unfamilair small pistol! This one
is in case you are unaware - one of relatively
few in the early days from Farmingdale
and so a ''silver'' color frame, and the
earlier blue CF grips. Frames now are
a very dark grey color and grips currently
black.
Thanks again due to "TW" for
taking all the pictures. Background music
is by Jennifer Athena Galatis - "Spheres
Opening Theme".
Video
stills compilation - lo-res
(2.2Mb)
Video stills compilation - hi-res
(8Mb)
PDF
file (1.9Mb)
|
|
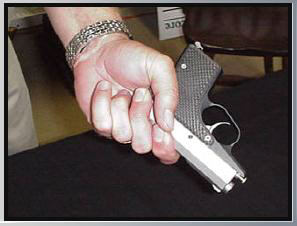
This
shows Eric employing his one hand hold
in order to keep the slide open for
pin extraction or re-insertion.
It is in fact remarkably efficient and
manageable, needing less hand strength
than my own old method (per my own video).
I think most people if they try and
emulate this will find it is not hard
to do.
Video
stills compilation - lo-res
(2.2Mb)
Video stills compilation - hi-res
(8Mb)
PDF
file (1.9Mb)
|
|
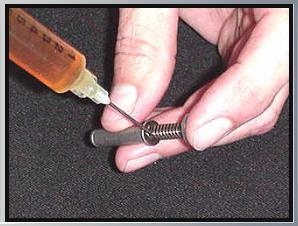
This
is one of the frames showing lubrication
of the gun - here recoil assembly inner
guide rod and spring.
I would mention that oil application
can be very sparing and I personally
these days favor Mobil 1 for the job.
Certainly anways, not a super thin oil
like 3-in-1 - there is a need for some
viscosity better than water!!
Video
stills compilation - lo-res
(2.2Mb)
Video stills compilation - hi-res
(8Mb)
PDF
file (1.9Mb)
|
|
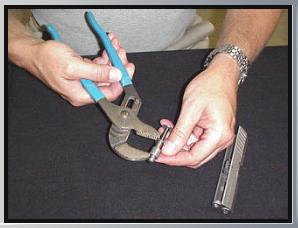
In my
own video on reassembly I used just
my hands (and the occasional cuss!)
to reinsert the recoil assembly but
this is not too easy, and certainly
not something everyone finds feasable.
Eric here demonstrates the process using
channel lock pliers and it is probably
the ideal and easier method. I would
stress though - good quality pliers
with crisp undamaged jaws. Note also
how the position selected ensures both
jaws parallel - most important so compressed
assembly cannot come out of the grip
and parts fly everywhere!
Video
stills compilation - lo-res
(2.2Mb)
Video stills compilation - hi-res
(8Mb)
PDF
file (1.9Mb)
|
|
This
is not a view many see, at least not
in the early days of ownership. I personally
would not include this area for the
routine clean and re-lube each 50 rounds
or so.
Much may depend on carry conditions
and carry duration, more than shots
fired. Eventually there could be some
slight ingress of crud and dissipation
of existing lubricant and so good judgement
is probably the way to go.
Please note - use a good quality Allen
wrench - 1/16" (0.0625") -
so that it engages snug in screw heads.
Even one thou undersize with poor quality
wrenches will be bad news, quickly!
Even assuming some Loctite has been
used on right panel screws, do check
them periodically as loosening is very
undesirable.
Video
stills compilation - lo-res
(2.2Mb)
Video stills compilation - hi-res
(8Mb)
PDF
file (1.9Mb)
|
|
Back to Top
|