|
|
Ammo' Expansion Testing - Introduction
I have not tried much of this in the past but Stephen
Camp gave me a few suggestions re the use of a water
soaked newsprint bundle. This was the best I could do,
in order to try and gain some comparitive data.
The bundle was soaked over 24 hours and more .. after
which it had swelled quite a bit - and was also danged
heavy! It was transported to range under a tarp cover
to reduce any drying out ... tho surplus water had drained
off.
Here is the set up for use ... propped up in order
to achieve a square approach to ''incoming''!! Distance
approx 9 feet.
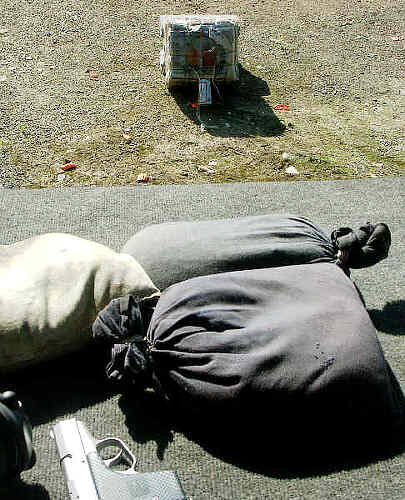
Closer look ...... (the ''dead soldier'' propping
up the stack - not from my consumption please note!!)
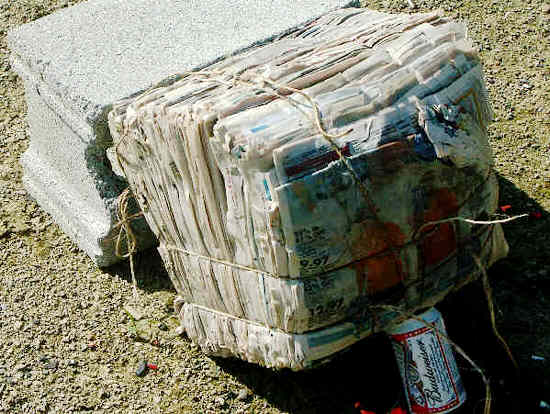
|
|
I fired three shots
each of Golden Saber, Gold Dot 115, Gold Dot 124,
Fed Hi-Shok (C9BP) and Fed Hydra-Shok 135.
Here are the intact rounds .. the Gold Dot bullet
design being the same for 115 and 124 apart from small
weight differential .........
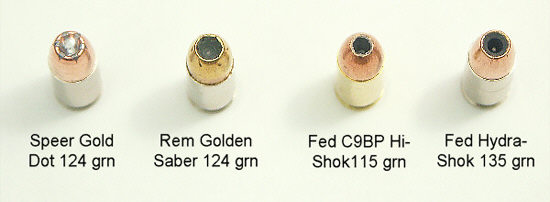
The shiny interior of the Speer bullet is very recognizable
and characteristic, with pre-stress areas around the
rim. The Golden Saber 124 grn is quite a deep hollow
and jacket is pre-stressed with a slight helical groove
pattern.
The Fed C9BP 115 grn is a small opening and quite
deep, but no interior ''pin''. Finally, the Hydra-Shok
with the now characteristic pin inside.
|
|
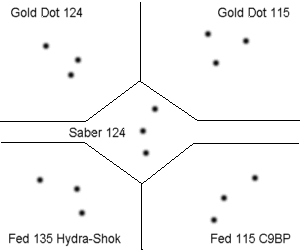
After shooting the
15 rounds, in groups of three, four corners and center
(well, sixteen rounds in fact as one 115 Gold Dot
''escaped'' because near edge of bundle!). The entry
holes were marked with old steel 7.62x39 cases - and
a sketch made for later reference. One or two cases
have fallen out in this pic.
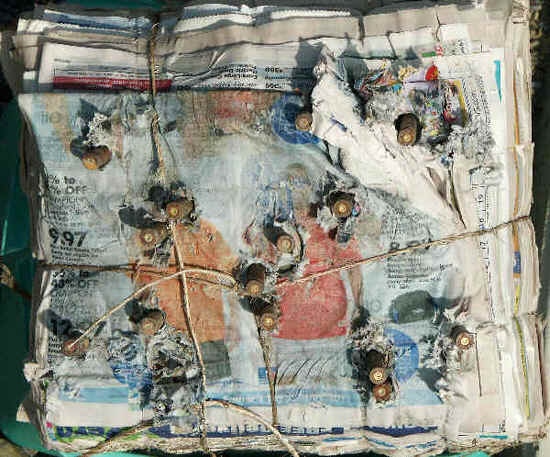
The whole
deal was then put back in the truck and transported
home. After which when I got to it .... it was dissassembled
layer by layer.. prior to that I attempted to estimate
penetration depths by use of a gun cleaning rod. Some
holes were a bit blocked with paper debris but I did
manage to get estimates sufficient to help with analysis.
I'll add this small diagram too ... it shows very
approximately the ''map'' of shot placement ... it
was initially just a sketch done at the time - at
least sufficient for me to use it as ref for finding
the spent bullets after. I don't think there were
any obvious ''clashes'' between adjacent examples.
|
I have
placed the results pics on a following page, in order
to keep page size down a bit. Expansion
Results .........
|
|
Back to Top
|

